Browser APIs and jQuery
JavaScript is the language that powers the interactive web! We use JavaScript as the primary language in these courses at CodeWizardsHQ:
| Elementary | Middle School | High School |
|---|---|---|
| Interactive Websites with JavaScript | Interactive JavaScript | Fundamentals of Web Development |
| Capstone 3 | Web Interfaces | User Interface Development |
| Capstone 2 | Capstone 1 | |
| Mastering APIs | APIs and Databases | |
| Capstone 3 | Capstone 2 | |
| DevOps and Software Engineering | ||
| Capstone 3 |
In this section of our documentation, you'll find references on how to use the built-in browser APIs and the jQuery library to manipulate webpages.
You'll also find many Further reading sections, which pull from these excellent JavaScript resources:
Adding JavaScript to Webpages
JavaScript programs at CWHQ are all run in a web browser, and they need to be included in an HTML document in order to run in the browser. There are several ways to do this, which will be outlined below.
Using a <script> tag in the <body>
The <script> tag is used to insert JavaScript programs directly into an HTML page. You should make the <script> tag the last tag in the <body> of an HTML document:
<!DOCTYPE html>
<html>
    <head>
        <title>Inserting JavaScript with a script tag in the body</title>
    </head>

    <body>
        <h1>This is HTML</h1>
        <script>
            // Everything in here is JavaScript
        </script>
    </body>
</html>
Using a <script> tag in the <head>
You can link an external JavaScript file to an HTML document using the <script> tag in the <head> of the document:
my-awesome-script.js
console.log("Hello, world!");
index.html
<!DOCTYPE html>
<html>
    <head>
        <title>Inserting JavaScript with a script tag in the head</title>
        <script src="my-awesome-script.js"></script>
    </head>

    <body>
        <h1>This is HTML</h1>
    </body>
</html>
Further Reading
- MDN - Use JavaScript Within A Webpage
- The Modern JavaScript Tutorial - Hello World
- Eloquent JavaScript - HTML and JavaScript
Adding jQuery to Webpages
The jQuery library is not part of the core Browser APIs and must be loaded in the <head> of your HTML document. You can find the most recent version of the jQuery library on their website. Generally, you want the minified version of the library, as that has all the core functionality in a smaller payload (which improves browser load times).
<!DOCTYPE html>
<html>
    <head>
        <title>Adding jQuery to a webpage</title>
        <script
            src="https://code.jquery.com/jquery-3.6.0.min.js"
            integrity="sha256-/xUj+3OJU5yExlq6GSYGSHk7tPXikynS7ogEvDej/m4="
            crossorigin="anonymous"
        ></script>
    </head>

    <body>
        <h1>This is HTML</h1>
    </body>
</html>
Further Reading
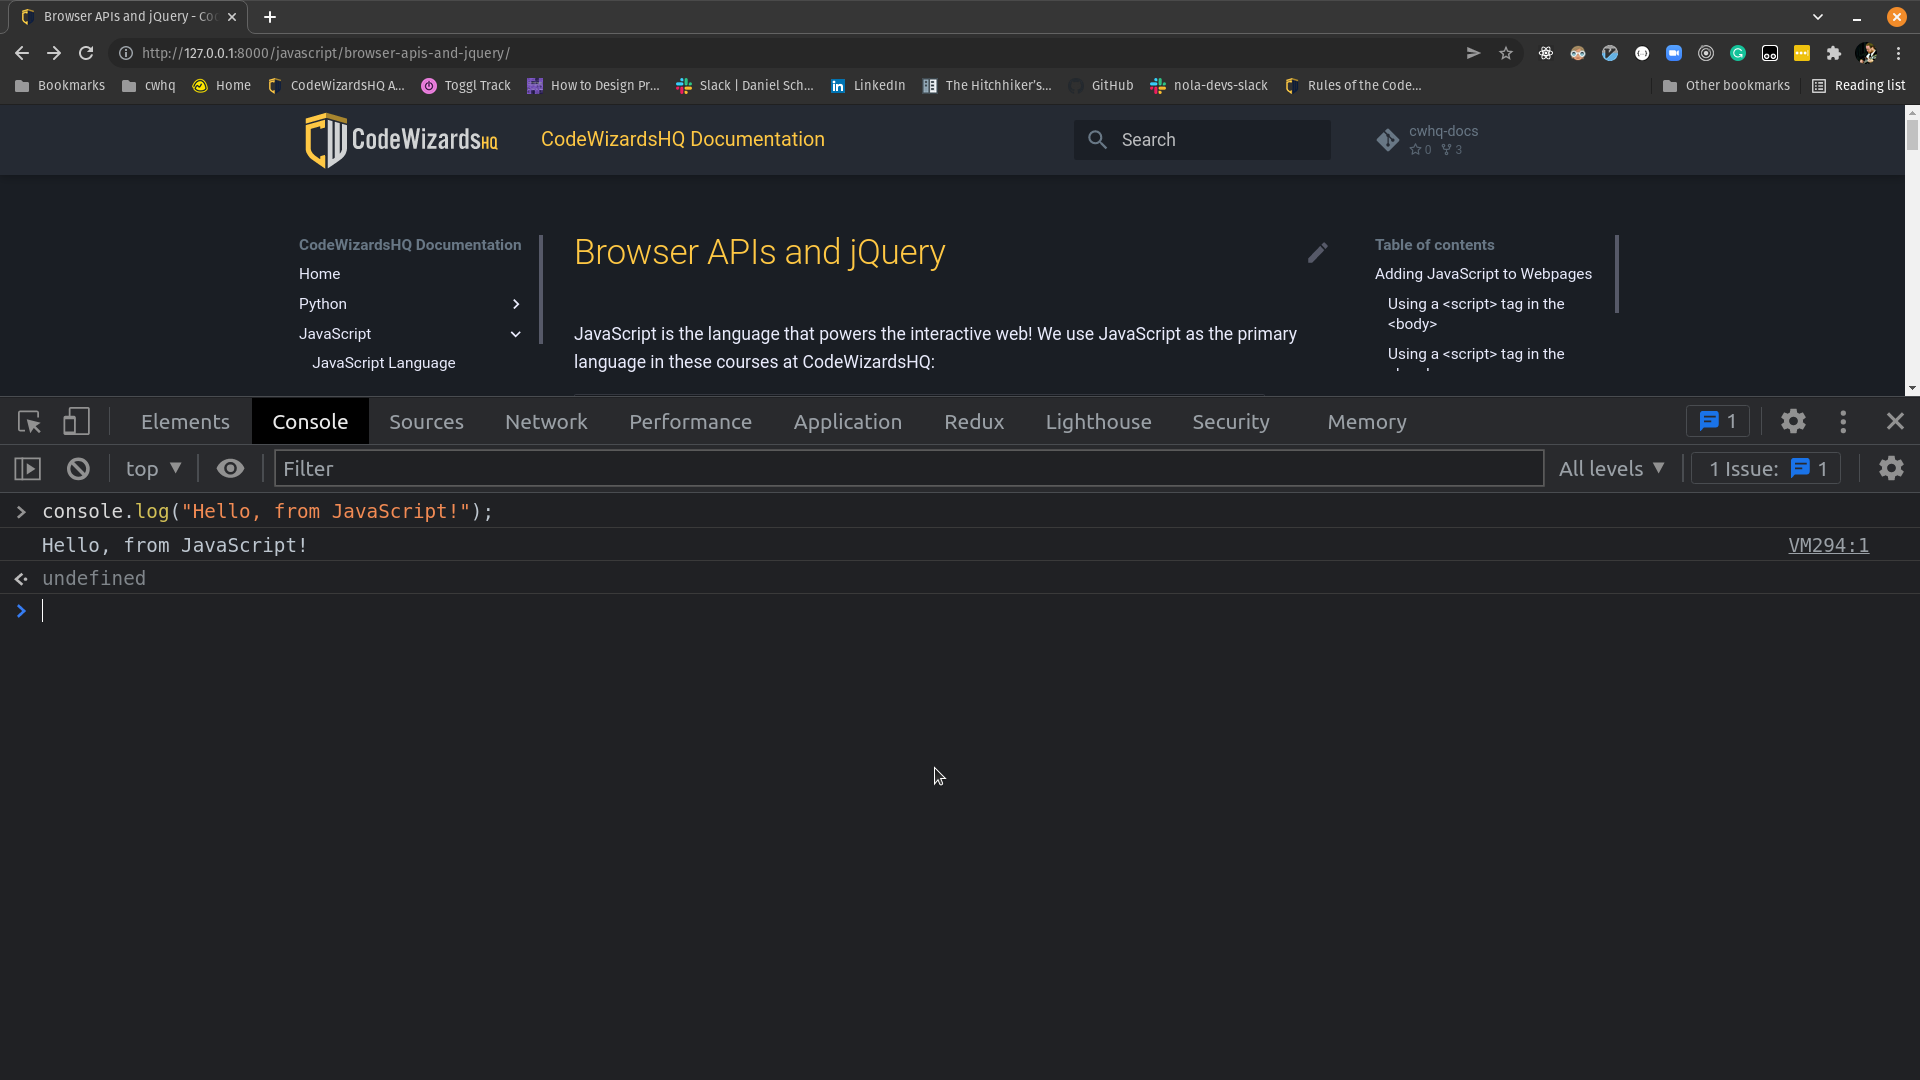
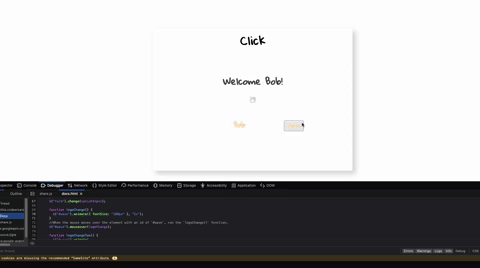
Using The Browser's Dev Tools
When working with JavaScript, the developer tools (dev tools for short) are your best friend! You should spend some time reading the documentation for the dev tools in your browser of choice.
We'll use Chrome in these examples, and they have excellent documentation here.
The JavaScript console
Once you've opened the dev tools in your browser of choice (look up how to do it for your browser) you'll have access to a Console tab. You can write JavaScript code here to test things out:
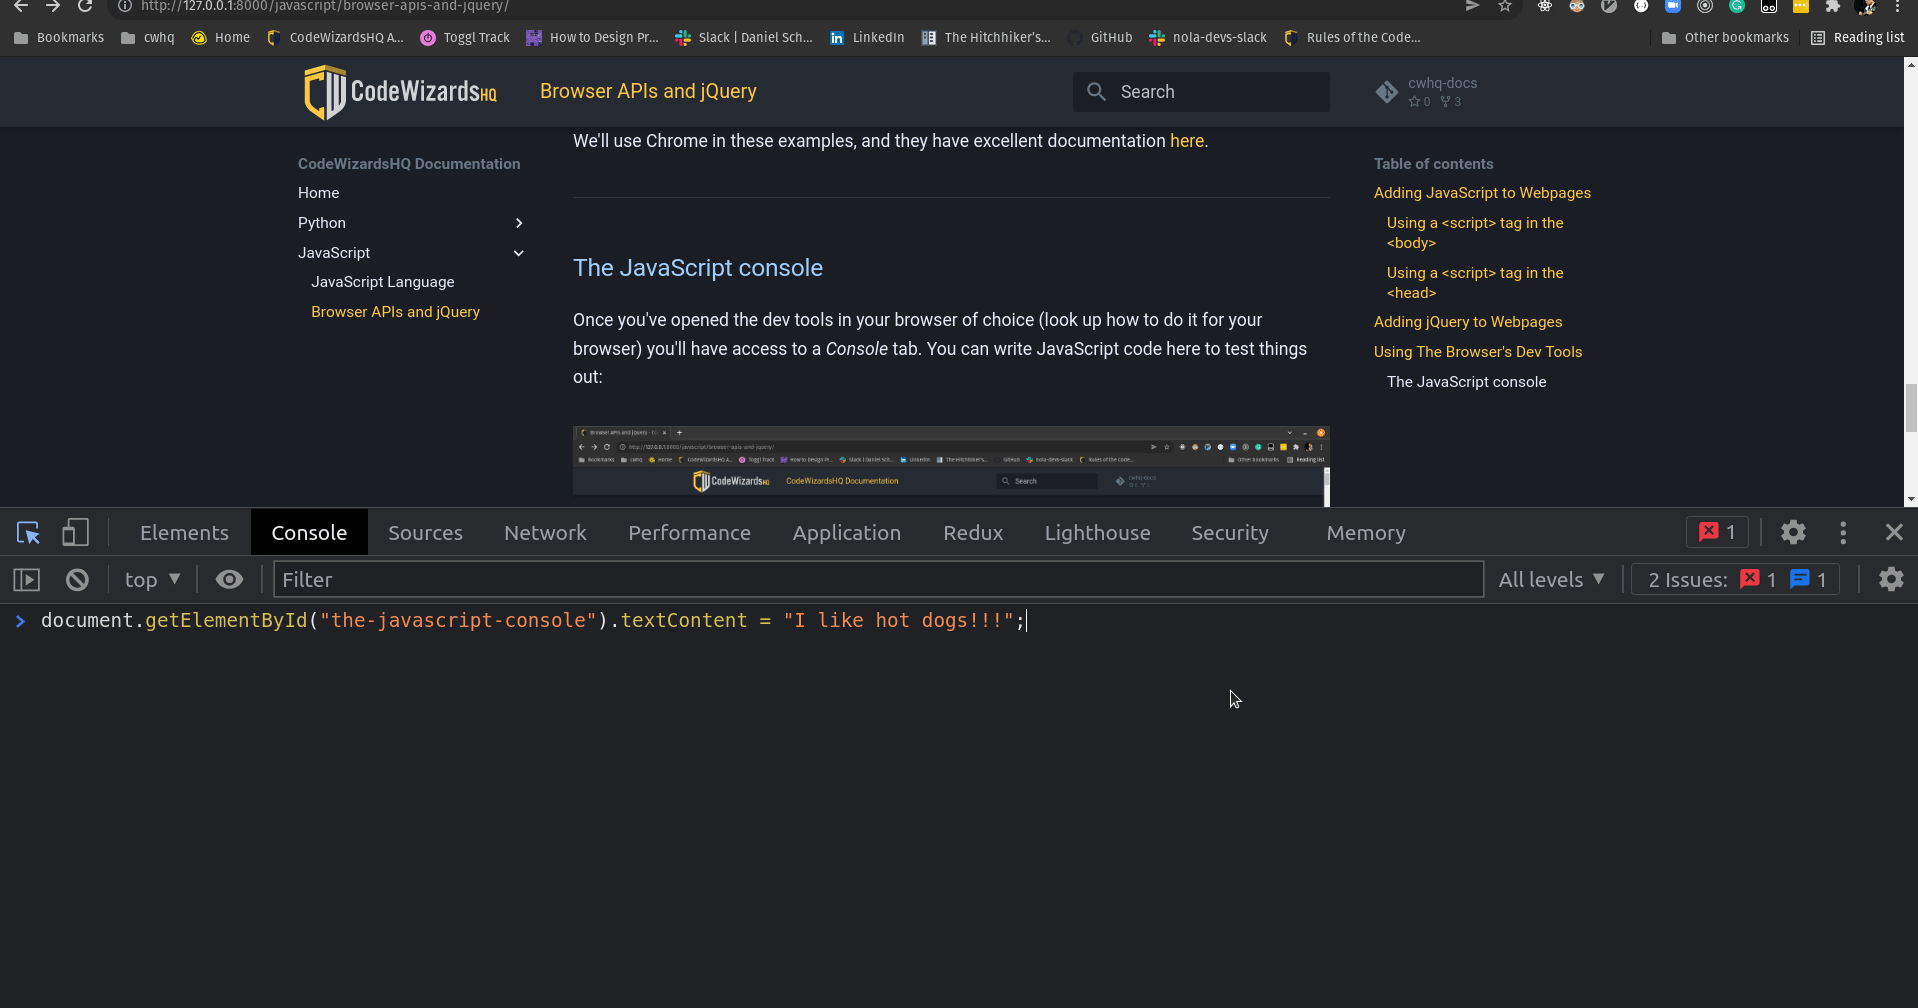
Modifying the DOM from the console
You have access to the DOM on the page and can edit it from the Console tab, just like if you were in a JavaScript program:
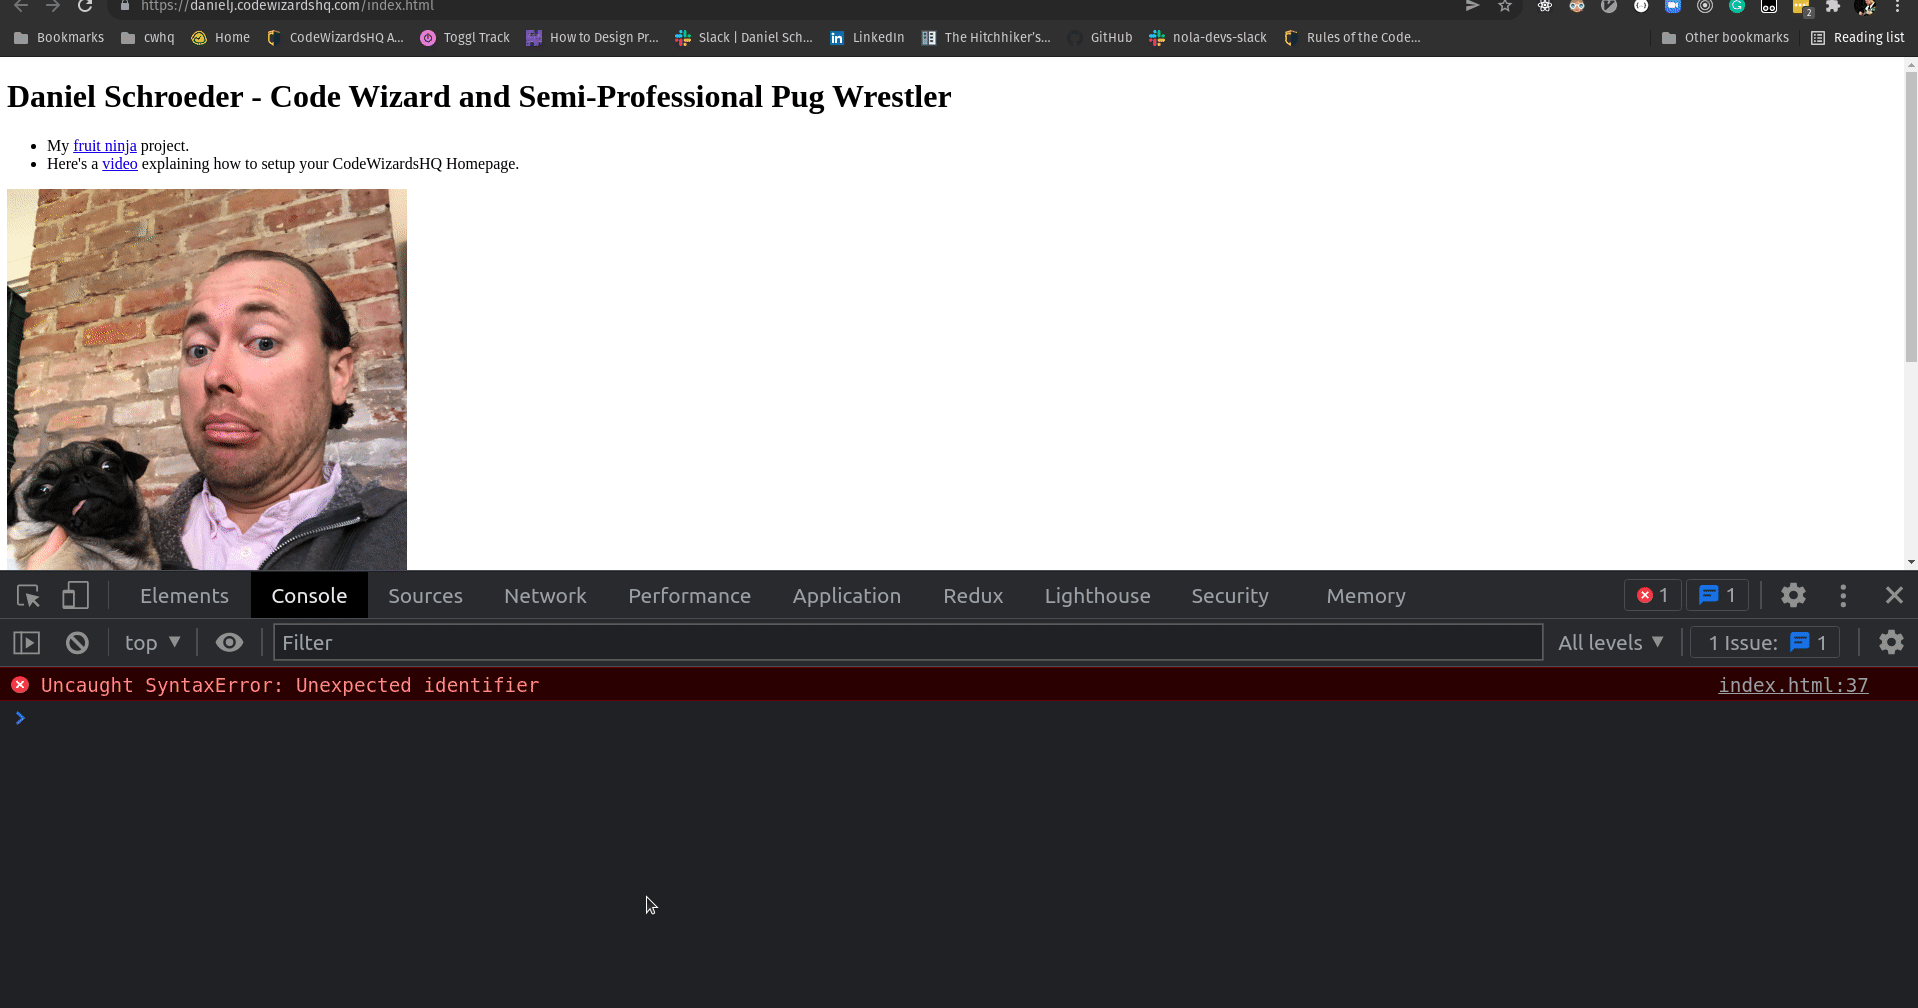
Debugging errors from the console
If something is not working as you expect, you should open the Console tab in the dev tools and see if there are any errors. This can save you hours of debugging time if you learn to do it well!
Often, you'll be given a link that opens the offending file and points at the exact line that caused the issue, as in this example:
<!DOCTYPE html>
<html>
    <head>
        <title>Daniel's Homepage</title>
    </head>

    <body>
        <h1>
            Daniel Schroeder - Code Wizard and Semi-Professional Pug Wrestler
        </h1>

        <!-- HTML abbreviated since it's not important -->

        <script>
            function thisHasAnError() {
                // uh oh, this will throw an error!
                vra rightBehindThis;
            }
        </script>
    </body>
</html>
Testing variables and functions from the console
You have access to any global variables and functions in the Console tab and can mess around with them to see if they are doing what you expect:
<!DOCTYPE html>
<html>
    <head>
        <title>Daniel's Homepage</title>
    </head>

    <body>
        <h1>
            Daniel Schroeder - Code Wizard and Semi-Professional Pug Wrestler
        </h1>

        <!-- HTML abbreviated since it's not important -->

        <script>
            var myFavoriteFood = "Tacos";

            function sayHello(name) {
                console.log("Hello, " + name);
            }
        </script>
    </body>
</html>
Further Reading
Adding Elements To A Webpage
jQuery has two methods to add elements to a webpage. One adds the element before the selected element and one adds it after.
<!DOCTYPE html>

<html>
    <head>
        <title>Adding Elements To A Webpage</title>
        <script
            src="https://code.jquery.com/jquery-3.6.0.min.js"
            integrity="sha256-/xUj+3OJU5yExlq6GSYGSHk7tPXikynS7ogEvDej/m4="
            crossorigin="anonymous"
        ></script>
        <style>
            button {
                margin: 48px auto;
                font-size: 24px;
            }
        </style>
    </head>

    <body>
        <div id="button-1-container">
            <button id="button-1">Button 1</button>
        </div>

        <button onclick="addButtonBefore();">
            Add a button before button 1
        </button>
        <button onclick="addButtonAfter();">Add a button after button 1</button>

        <script>
            var button1Container = $("#button-1-container");

            function addButtonBefore() {
                button1Container.prepend("<button>Before Button 1</button>");
            }

            function addButtonAfter() {
                button1Container.append("<button>After Button 1</button>");
            }
        </script>
    </body>
</html>

Animations
animate()
jQuery's animate() method allows us to create animations on CSS properties.
Function signature:
animate(properties, duration, callback)
Parameters:
properties(object): The CSS properties to animateduration(number): The duration of the animation in milliseconds (optional)callback(function): The function to call once animation completes (optional)
<!DOCTYPE html>
<html>
    <head>
        <title>Animations</title>
        <script
            src="https://code.jquery.com/jquery-3.6.0.min.js"
            integrity="sha256-/xUj+3OJU5yExlq6GSYGSHk7tPXikynS7ogEvDej/m4="
            crossorigin="anonymous"
        ></script>
    </head>

    <body>
        <div class="container">
            <div class="object" id="one"></div>
        </div>

        <script>
            function tinyFadeOut() {
                var animateCSS = {
                    opacity: 0,
                };
                $(".object").animate(animateCSS);
            }

            $(".object").click(tinyFadeOut);
        </script>
    </body>
</html>
Setting an animation time
You can optionally pass in the time (in milliseconds) that an animation should run as the second parameter to the animate() method:
function tinyFadeOut() {
    var animateCSS = {
        opacity: 0,
    };
    // Here we can control the duration of the animation
    var animationTime = 5000; // 5 seconds

    $(".object").animate(animateCSS, animationTime);
}

$(".object").click(tinyFadeOut);
Running a function when the animation finishes
You can optionally pass a function as the third argument to animate(). This function will run when the animation is complete:
function moveRight() {
    var animateCSS = {
        // Here we are adding 200px to the left property
        left: "+=200",
    };
    var animationTime = 5000;
    // Once the animation is complete, we run the callback function `moveLeft()`
    $(".object").animate(animateCSS, animationTime, moveLeft);
}

function moveLeft() {
    var animateCSS = {
        // Here we are subtracting 200px to the left property
        left: "-=200",
    };
    $(".object").animate(animateCSS);
}

$(".object").click(moveRight);

Further Reading
jQuery Events
The following event methods handle events on our webpage. They all have a similar function signature (except the on() method):
$("cssSelector").methodName(callbackFunction);
change()
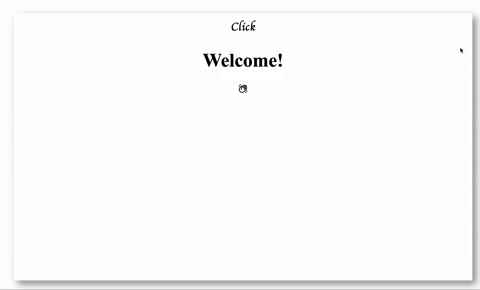
The change() method will execute a function when the input value has changed.
<!DOCTYPE html>
<html>
<head>
<title>The Change Event</title>
<script
src="https://code.jquery.com/jquery-3.6.0.min.js"
integrity="sha256-/xUj+3OJU5yExlq6GSYGSHk7tPXikynS7ogEvDej/m4="
crossorigin="anonymous"
></script>
</head>
<body>
<div>
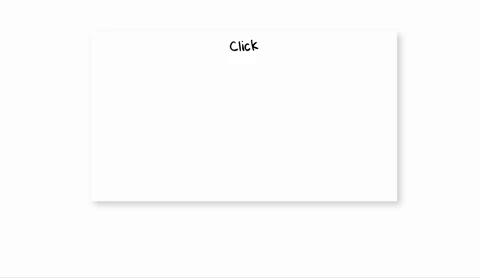
<button id="name">Click</button>
<h1 id="heading">Welcome!</h1>
<span class="material-icons-outlined" id="wave"> waving_hand </span>
<form>
<input
type="text"
placeholder="Enter Wizard Name"
id="wizardName"
autocomplete="off"
/>
<input id="sub" type="submit" value="Submit" />
</form>
</div>
<script>
function vanishInput() {
$("form").fadeOut();
}
/*
* Run the `vanishInput()` function when any `<input>`
* element in the `<form>` is changed.
*/
$("form").change(vanishInput);
</script>
</body>
</html>
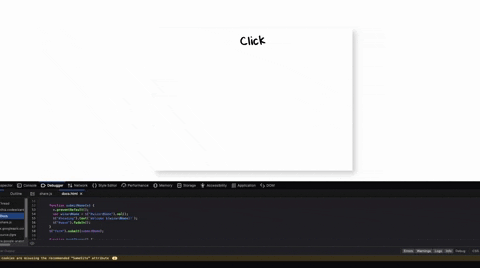
click()
The click() method allows you to execute a function when element is clicked.
<!DOCTYPE html>
<html>
    <head>
        <title>The Click Event</title>
        <script
            src="https://code.jquery.com/jquery-3.6.0.min.js"
            integrity="sha256-/xUj+3OJU5yExlq6GSYGSHk7tPXikynS7ogEvDej/m4="
            crossorigin="anonymous"
        ></script>
    </head>

    <body>
        <div>
            <button id="name">Click</button>
            <h1 id="heading">Welcome!</h1>
            <span class="material-icons-outlined" id="wave"> waving_hand </span>

            <form>
                <input
                    type="text"
                    placeholder="Enter Wizard Name"
                    id="wizardName"
                    autocomplete="off"
                />
                <input id="sub" type="submit" value="Submit" />
            </form>
        </div>

        <script>
            function clickHeading() {
                $("#heading").show();
                $("form").show();
            }

            /*
             *   When the button with the id of `name` is clicked,
             *   the `clickHeading()` function will run.
             */
            $("#name").click(clickHeading);
        </script>
    </body>
</html>
hover()
The hover() method allows you to execute a function when the cursor hovers over an element.
<!DOCTYPE html>
<html>
    <head>
        <title>The Hover Event</title>
        <script
            src="https://code.jquery.com/jquery-3.6.0.min.js"
            integrity="sha256-/xUj+3OJU5yExlq6GSYGSHk7tPXikynS7ogEvDej/m4="
            crossorigin="anonymous"
        ></script>
    </head>

    <body>
        <div>
            <button id="name">Click</button>
            <h1 id="heading">Welcome!</h1>
            <span class="material-icons-outlined" id="wave"> waving_hand </span>

            <form>
                <input
                    type="text"
                    placeholder="Enter Wizard Name"
                    id="wizardName"
                    autocomplete="off"
                />
                <input id="sub" type="submit" value="Submit" />
            </form>
        </div>

        <script>
            function turnToGold() {
                var headingCSS = {
                    color: "gold",
                };
                $("#heading").css(headingCss);
            }

            /*
             *   When you hover over the element with the id of `#heading`,
             *   call the `turnToGold()` function.
             */
            $("#heading").hover(turnToGold);
        </script>
    </body>
</html>
mousemove()
The mousemove() method allows you to execute a function when the mouse moves on top of the given element.
<!DOCTYPE html>
<html>
    <head>
        <title>The Mousemove Event</title>
        <script
            src="https://code.jquery.com/jquery-3.6.0.min.js"
            integrity="sha256-/xUj+3OJU5yExlq6GSYGSHk7tPXikynS7ogEvDej/m4="
            crossorigin="anonymous"
        ></script>
    </head>

    <body>
        <div>
            <button id="name">Click</button>
            <h1 id="heading">Welcome!</h1>
            <span class="material-icons-outlined" id="wave"> waving_hand </span>

            <form>
                <input
                    type="text"
                    placeholder="Enter Wizard Name"
                    id="wizardName"
                    autocomplete="off"
                />
                <input id="sub" type="submit" value="Submit" />
            </form>
        </div>

        <script>
            function changeLogo() {
                var changeLogoCSS = {
                    color: "blue",
                };
                $("#wave").css(changeLogoCSS);
            }

            /*
             *   When the mouse moves around the element with an
             *   id of `#wave`, run the `changeLogo()` function.
             */
            $("#wave").mousemove(changeLogo);
        </script>
    </body>
</html>
mouseover()
The mouseover() method allows you to execute a function when the mouse is over the element.
<!DOCTYPE html>
<html>
    <head>
        <title>The Mouseover Event</title>
        <script
            src="https://code.jquery.com/jquery-3.6.0.min.js"
            integrity="sha256-/xUj+3OJU5yExlq6GSYGSHk7tPXikynS7ogEvDej/m4="
            crossorigin="anonymous"
        ></script>
    </head>

    <body>
        <div>
            <button id="name">Click</button>
            <h1 id="heading">Welcome!</h1>
            <span class="material-icons-outlined" id="wave"> waving_hand </span>

            <form>
                <input
                    type="text"
                    placeholder="Enter Wizard Name"
                    id="wizardName"
                    autocomplete="off"
                />
                <input id="sub" type="submit" value="Submit" />
            </form>
        </div>

        <script>
            function changeLogo() {
                var changeLogoCSS = {
                    fontSize: "100px",
                };
                $("#wave").animate(changeLogoCSS, "2s");
            }

            /*
             *   When the mouse moves over the element with an
             *   id of `#wave`, run the `changeLogo()` function.
             */
            $("#wave").mouseover(changeLogo);
        </script>
    </body>
</html>
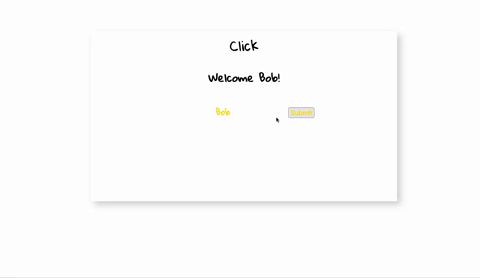
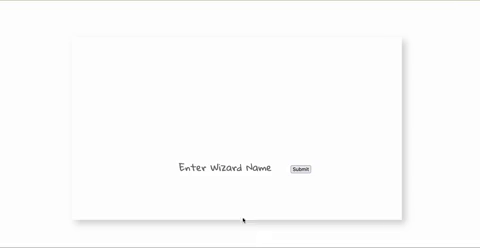
submit()
The submit() method allows you to submit form values.
<!DOCTYPE html>
<html>
    <head>
        <title>Submitting Form Values</title>
        <script
            src="https://code.jquery.com/jquery-3.6.0.min.js"
            integrity="sha256-/xUj+3OJU5yExlq6GSYGSHk7tPXikynS7ogEvDej/m4="
            crossorigin="anonymous"
        ></script>
    </head>

    <body>
        <div>
            <button id="name">Click</button>
            <h1 id="heading">Welcome!</h1>
            <span class="material-icons-outlined" id="wave"> waving_hand </span>

            <form>
                <input
                    type="text"
                    placeholder="Enter Wizard Name"
                    id="wizardName"
                    autocomplete="off"
                />
                <input id="sub" type="submit" value="Submit" />
            </form>
        </div>

        <script>
            function submitWizardName(event) {
                event.preventDefault();
                var wizardName = $("#wizardName").val();
                $("#heading").text(`Welcome ${wizardName}!`);
            }

            /*
             *   When the `<form>` is submitted, run the
             *   the `submitWizardName()` function.
             */
            $("form").submit(submitWizardName);
        </script>
    </body>
</html>
on()
The on() method allows you to run any event on an element.
Syntax:
$("cssSelector").on("eventName", callbackFunction);
Example Output:
function clickedBody() {
    alert("You clicked on the body!");
}

$("body").on("click", clickedBody);
off()
To remove any events from an element use the off() method
function removeEvent() {
    $("body").off("click");
    alert("Click has been deactivated!");
}

// setTimeout() will call removeEvent() after 5000 milliseconds(5 seconds)
setTimeout(removeEvent, 5000);
Further Reading
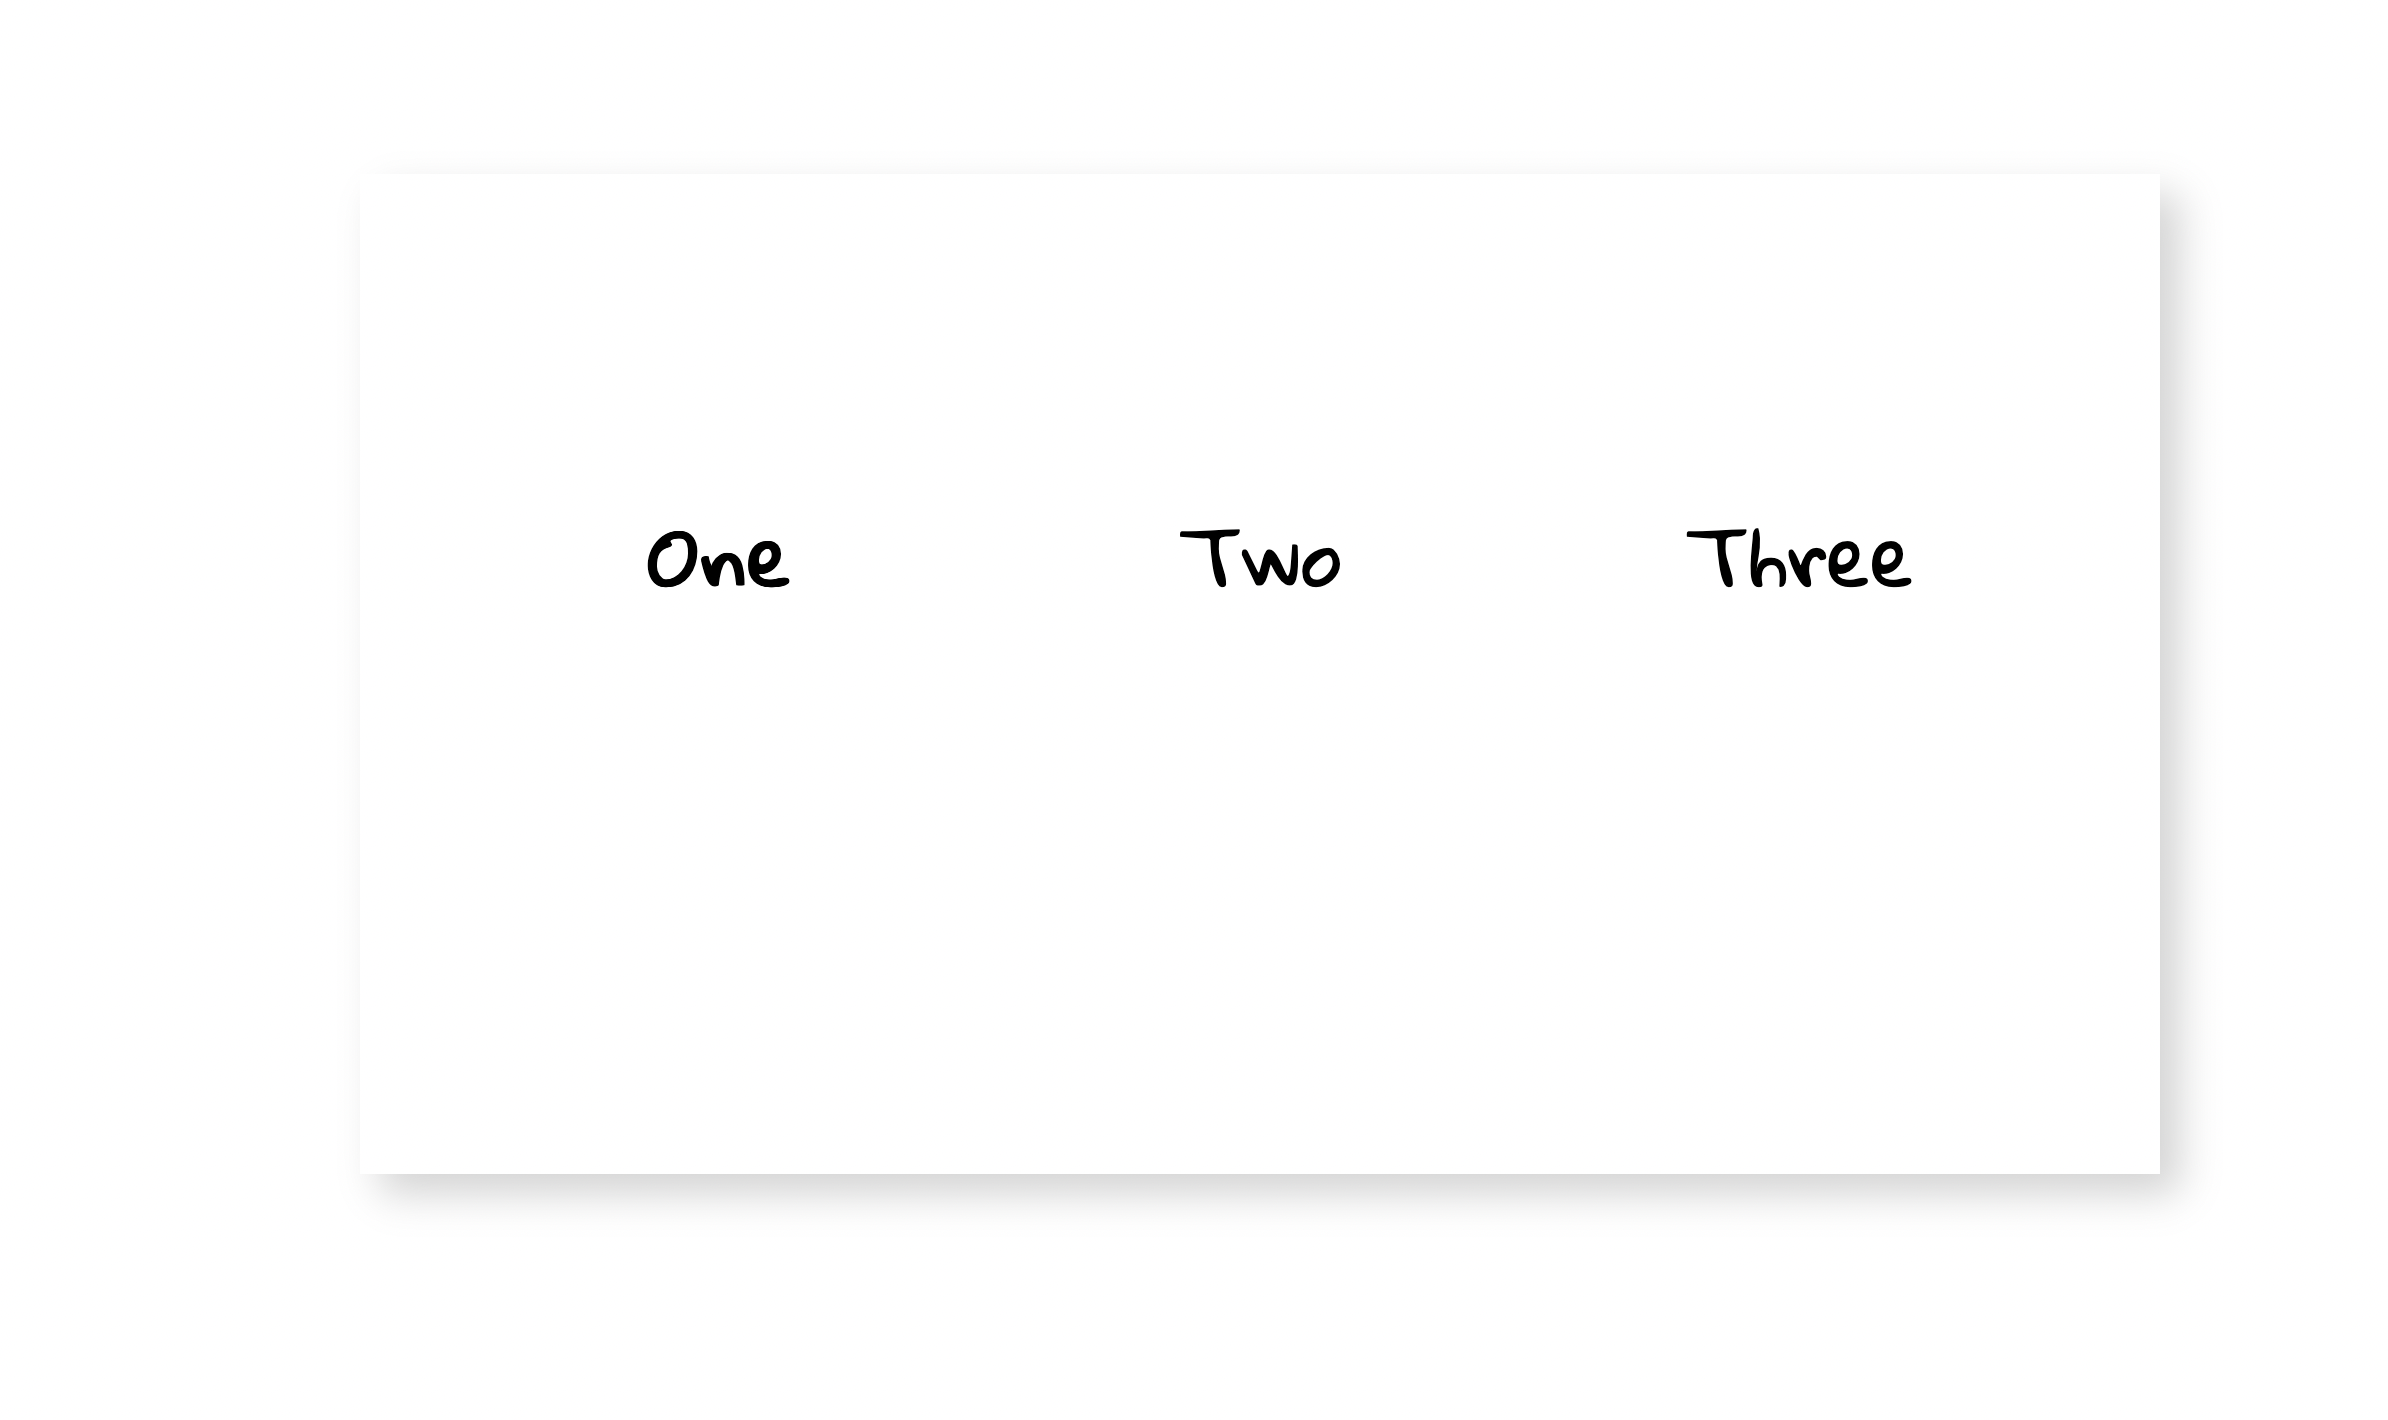
Getting And Setting An Element's Content
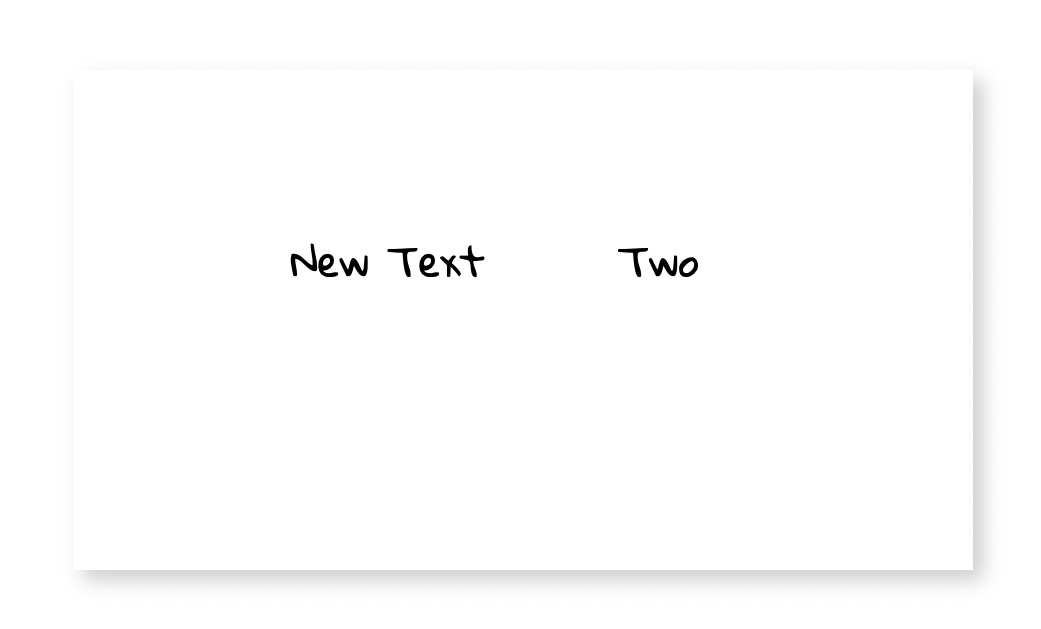
element.textContent
The textContent property sets or returns the text content of an element.
<!DOCTYPE html>
<html>
    <head>
        <title>Changing The Text Of An Element</title>
    </head>

    <body>
        <div>
            <div class="object" id="one">One</div>
            <div class="object" id="two">Two</div>
        </div>
        <script>
            function changeText() {
                var element = document.querySelector("#one");
                /*
                 * Here we are setting the text content of the element with the
                 * id `one` to the new text.
                 */
                element.textContent = "New Text";
            }

            changeText();
        </script>
    </body>
</html>
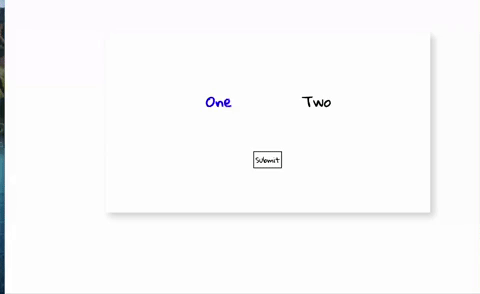
$(element).text()
jQuery's text() method allows you to get or set the text of an HTML element.
<!DOCTYPE html>
<html>
    <head>
        <title>Setting The Text Of An Element</title>
        <script
            src="https://code.jquery.com/jquery-3.6.0.min.js"
            integrity="sha256-/xUj+3OJU5yExlq6GSYGSHk7tPXikynS7ogEvDej/m4="
            crossorigin="anonymous"
        ></script>
    </head>

    <body>
        <div>
            <div class="container">
                <div class="object" id="one"></div>
            </div>

            <form>
                <input
                    type="text"
                    placeholder="Enter Wizard Name"
                    id="wizardName"
                    autocomplete="off"
                />
                <input id="sub" type="submit" value="Submit" />
            </form>
        </div>

        <script>
            function submitName(event) {
                event.preventDefault();
                var wizardName = $("#wizardName").val();
                /*
                 * Here we are setting the text of element with the
                 * ID `one` to the value of the input text in the `<input>`.
                 */
                $("#one").text(`Welcome ${wizardName}!`);
            }

            $("form").submit(submitName);
        </script>
    </body>
</html>
element.innerHtml
The innerHtml property sets or returns the HTML of an element.
<!DOCTYPE html>
<html>
    <head>
        <title>Changing The HTML Of An Element</title>
    </head>

    <body>
        <div>
            <div class="container">
                <div class="object" id="one">One</div>
                <div class="object" id="two">Two</div>
            </div>
        </div>
        <script>
            // Here we are adding an HTML element to the existing .container element
            var element3 = document.querySelector(".container");
            element3.innerHTML += "<div class='object'>Three</div>";
        </script>
    </body>
</html>
$(element).html()
jQuery's html() method allows you to change the innerHTML of an element.
<!DOCTYPE html>
<html>
    <head>
        <title>Changing The HTML Of An Element</title>
        <script
            src="https://code.jquery.com/jquery-3.6.0.min.js"
            integrity="sha256-/xUj+3OJU5yExlq6GSYGSHk7tPXikynS7ogEvDej/m4="
            crossorigin="anonymous"
        ></script>

        <style>
            #one {
                color: blue;
            }
        </style>
    </head>

    <body>
        <div>
            <div class="container">
                <div class="object" id="one">One</div>
                <div class="object" id="two">Two</div>
                <button id="change-html-button">Submit</button>
            </div>
        </div>
        <script>
            function changeHTML() {
                /*
                 * Here we are returning the HTML of the element with the
                 * ID `one` and replacing the HTML of the element with the
                 * id `two`.
                 */
                var newContent = $("#one").html();
                $("#two").html(newContent);
            }

            $("#change-html-button").click(changeHTML);
        </script>
    </body>
</html>
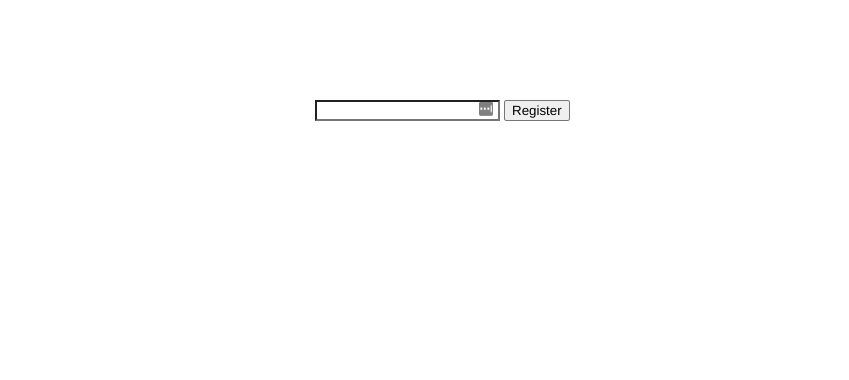
element.value
When using <form> elements like <input> and <textarea>, the element.value property gives you the text inside the element. You can also use this to set the value of a <form> element's text.
<!DOCTYPE html>

<html>
    <head>
        <title>Getting The Value Of A Form Element</title>
        <style>
            form {
                width: 256px;
                margin: 100px auto;
            }

            #greeting {
                text-align: center;
                margin-top: 12px;
            }
        </style>
    </head>

    <body>
        <form>
            <input type="text" id="username" />
            <button>Register</button>
            <div id="greeting"></div>
        </form>

        <script>
            var usernameElement = document.querySelector("#username");
            var formElement = document.querySelector("form");
            var greetingElement = document.querySelector("#greeting");

            formElement.addEventListener("submit", registerUser);

            function registerUser(event) {
                event.preventDefault();
                var username = usernameElement.value;
                greetingElement.textContent = `Greetings ${username}!`;
            }
        </script>
    </body>
</html>
$(element).val()
jQuery's .val() method allows you to get or set the value of a <form> element such as an <input> or <textarea>.
<!DOCTYPE html>

<html>
    <head>
        <title>Getting The Value Of A Form Element</title>
        <script
            src="https://code.jquery.com/jquery-3.6.0.min.js"
            integrity="sha256-/xUj+3OJU5yExlq6GSYGSHk7tPXikynS7ogEvDej/m4="
            crossorigin="anonymous"
        ></script>
        <style>
            form {
                width: 256px;
                margin: 100px auto;
            }

            #greeting {
                text-align: center;
                margin-top: 12px;
            }
        </style>
    </head>

    <body>
        <form>
            <input type="text" id="username" />
            <button>Register</button>
            <div id="greeting"></div>
        </form>

        <script>
            $("form").on("submit", registerUser);

            function registerUser(event) {
                event.preventDefault();
                var username = $("#username").val();
                $("#greeting").text(`Greetings ${username}!`);
            }
        </script>
    </body>
</html>
Further Reading
- MDN - textContent
- MDN - innerHTML
- MDN - HTMLDataElement.value
- Eloquent JavaScript - Node Properties
- Learn jQuery - Manipulating Elements
- jQuery API - text
- jQuery API - html
- jQuery API - val
Getting and Setting Attributes
getAttribute()
The getAttribute() function allows you to access the attribute of an element
<!DOCTYPE html>
<html>
    <head>
        <title>Getting Attributes</title>
    </head>

    <body>
        <div>
            <div class="object" id="one"></div>
            <img class="object" id="two" src="" />
            <input type="text" placeholder="Dog Name" id="three" />
        </div>

        <script>
            var element = document.querySelector("#three");

            var elementAttribute = element.getAttribute("type");
            console.log("The input type is " + elementAttribute);
        </script>
    </body>
</html>
Example Output:
The input type is text
setAttribute()
The setAttribute() function allows you to set or update the attribute of an element
<!DOCTYPE html>
<html>
    <head>
        <title>Setting Attributes</title>
    </head>

    <body>
        <div>
            <div class="object" id="one"></div>
            <img class="object" id="two" src="" />
        </div>

        <script>
            var imageElement = document.getElementById("two");
            imageElement.setAttribute("src", "dog.png");
        </script>
    </body>
</html>
Example Output:
attr()
jQuery's attr() function allows you access or add the attribute to an element
<!DOCTYPE html>
<html>
    <head>
        <title>Working With Attributes</title>
        <script
            src="https://code.jquery.com/jquery-3.6.0.min.js"
            integrity="sha256-/xUj+3OJU5yExlq6GSYGSHk7tPXikynS7ogEvDej/m4="
            crossorigin="anonymous"
        ></script>
    </head>

    <body>
        <div>
            <img class="object" id="one" src="" />
            <img class="object" id="two" src="" />
        </div>

        <script>
            function clickedPicture(event) {
                var clicked = event.target;

                // Here we are grabbing the id attribute of the clicked image
                var id = $(clicked).attr("id");

                if (id == "one") {
                    $("#one").attr("src", "dog.jpg");
                } else if (id == "two") {
                    $("#two").attr("src", "cat.jpg");
                }
            }
            $(".object").click(clickedPicture);
        </script>
    </body>
</html>
Using attributes as properties
When you select an element from the DOM, there are many properties that live on the element. These can be accessed with dot notation (.), and some common attributes (like style, id, and src) are easy to get and set as a property.
<!DOCTYPE html>
<html>
    <head>
        <title>Setting Attributes Through Element Properties</title>
        <script
            src="https://code.jquery.com/jquery-3.6.0.min.js"
            integrity="sha256-/xUj+3OJU5yExlq6GSYGSHk7tPXikynS7ogEvDej/m4="
            crossorigin="anonymous"
        ></script>
    </head>

    <body>
        <div>
            <img class="object" id="one" src="" />
            <img class="object" id="two" src="" />
        </div>

        <script>
            var imageOne = document.getElementById("one");
            var imageTwo = document.getElementById("two");

            function clickedPicture(event) {
                var clicked = event.target;

                // Here we are grabbing the id attribute of the clicked image
                var id = clicked.id;

                if (id == "one") {
                    // We can use the `src` attribute directly
                    imageOne.src = "dog.jpg";
                } else if (id == "two") {
                    imageTwo.src = "cat.jpg";
                }
            }

            $(".object").click(clickedPicture);
        </script>
    </body>
</html>
Further Reading
- MDN - getAttribute
- MDN - setAttribute
- The Modern JavaScript Tutorial - Attributes and Properties
- Eloquent JavaScript - Attributes
Getting the size and position of an element
The following properties return the size and position of an element:
<!DOCTYPE html>
<html>
    <head>
        <title>Size & Position</title>
        <script
            src="https://code.jquery.com/jquery-3.6.0.min.js"
            integrity="sha256-/xUj+3OJU5yExlq6GSYGSHk7tPXikynS7ogEvDej/m4="
            crossorigin="anonymous"
        ></script>
        <style>
            #one {
                width: 300px;
                height: 200px;
                position: absolute;
                left: 250px;
                top: 100px;
            }
        </style>
    </head>

    <body>
        <div class="container">
            <div class="object" id="one"></div>
        </div>

        <script>
            var element = document.querySelector("#one");

            // The offsetWidth property returns an integer value for an element's width.
            var elementWidth = element.offsetWidth;
            console.log(` Element width: ${elementWidth}px`);

            // The offsetHeight property returns an integer value for an element's height.
            var elementHeight = element.offsetHeight;
            console.log(` Element height: ${elementHeight}px`);

            // The offsetLeft property returns an integer value for an element's left position.
            var elementLeft = element.offsetLeft;
            console.log(` Element left position: ${elementLeft}px`);

            // The offsetTop property returns an integer value for an element's top position.
            var elementTop = element.offsetTop;
            console.log(` Element top position: ${elementTop}px`);
        </script>
    </body>
</html>
Example Output:
 Element width: 300px
 Element height: 200px
 Element left position: 250px
 Element top position: 100px

Further Reading
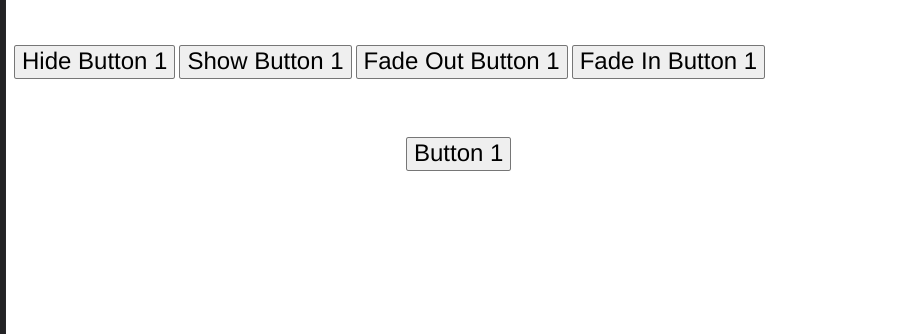
Hiding and Showing Elements
jQuery has a few different methods for hiding/showing elements. Depending on your needs, you may want the element to fade in/out or not.
<!DOCTYPE html>

<html>
    <head>
        <title>Hiding and Showing Elements</title>
        <script
            src="https://code.jquery.com/jquery-3.6.0.min.js"
            integrity="sha256-/xUj+3OJU5yExlq6GSYGSHk7tPXikynS7ogEvDej/m4="
            crossorigin="anonymous"
        ></script>
        <style>
            button {
                margin: 48px auto;
                font-size: 24px;
            }

            #button-1 {
                position: fixed;
                top: 100px;
                left: 400px;
            }
        </style>
    </head>

    <body>
        <button id="button-1">Button 1</button>

        <button onclick="hideButton1();">Hide Button 1</button>
        <button onclick="showButton1();">Show Button 1</button>
        <button onclick="fadeOutButton1();">Fade Out Button 1</button>
        <button onclick="fadeInButton1();">Fade In Button 1</button>

        <script>
            var button1 = $("#button-1");

            function hideButton1() {
                button1.hide();
            }

            function showButton1() {
                button1.show();
            }

            function fadeOutButton1() {
                button1.fadeOut();
            }

            function fadeInButton1() {
                button1.fadeIn();
            }
        </script>
    </body>
</html>
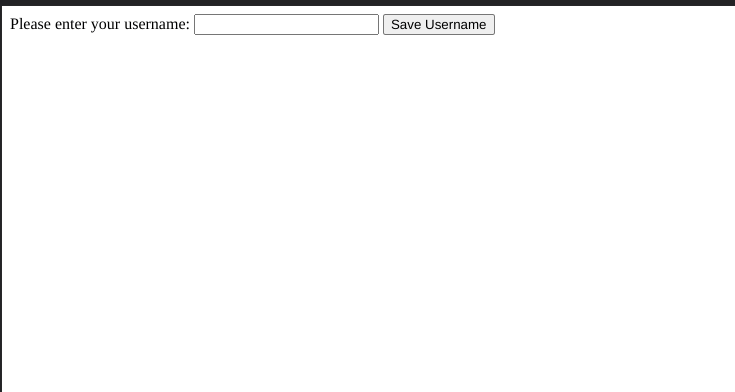
Saving Items In localStorage
Web browsers allow you to save information in localStorage. This data will exist between page loads as long as the user doesn't clear the browser's cookies.
<!DOCTYPE html>

<html>
    <head>
        <title>Adding Elements To A Webpage</title>
        <script
            src="https://code.jquery.com/jquery-3.6.0.min.js"
            integrity="sha256-/xUj+3OJU5yExlq6GSYGSHk7tPXikynS7ogEvDej/m4="
            crossorigin="anonymous"
        ></script>
    </head>

    <body>
        <form>
            <label for="username">
                Please enter your username:
                <input type="text" id="username" name="username" />
            </label>
            <button type="submit">Save Username</button>
        </form>

        <div id="previous-users-container"></div>

        <script>
            $("form").submit(saveUsername);

            function saveUsername(event) {
                event.preventDefault();

                var username = $("#username").val();
                var nextUserNumber = localStorage.length;

                localStorage.setItem(`userNumber-${nextUserNumber}`, username);

                showPreviousUsers();
            }

            function showPreviousUsers() {
                $("#previous-users-container").html("");
                for (var i = 0; i < localStorage.length; i++) {
                    var username = localStorage.getItem(`userNumber-${i}`);
                    $("#previous-users-container").append(`<p>${username}</p>`);
                }
            }
        </script>
    </body>
</html>
Selecting Elements From HTML Documents
The document object allows you to interact with HTML documents from a JavaScript program. The most important thing you'll use the document object for is querying an HTML document for an element or elements. There are several methods to do this using the native document object. jQuery also provides a way to query HTML documents, and we'll cover both methods below.
Getting an element by id
The document.getElementById() method allows you to select an HTML element by it's id attribute:
<!DOCTYPE html>
<html>
    <head>
        <title>Daniel's Homepage</title>
    </head>

    <body>
        <!-- This is the element we'll grab from our JavaScript program -->
        <h1 id="page-title">
            Daniel Schroeder - Code Wizard and Semi-Professional Pug Wrestler
        </h1>

        <!-- HTML abbreviated since it's not important -->

        <script>
            // Get the #page-title element and store it in a variable
            var pageTitleElement = document.getElementById("page-title");
            // Change the font color of the #page-title element
            pageTitleElement.style.color = "blue";

            // Can also do everything in one line
            document.getElementById("page-title").style.color = "blue";
        </script>
    </body>
</html>
Getting an element by class name
The document.getElementsByClassName() method allows you to return the selected HTML elements by it's class attribute:
<!DOCTYPE html>
<html>
    <head>
        <title>Home</title>
    </head>

    <body>
        <div class="container">
            <div class="object"></div>
            <div class="object"></div>
            <div class="object"></div>
        </div>
        <script>
            // Return all elements with the class name of `object`
            var allObjects = document.getElementsByClassName("object");

            // changeBackground() will change the background color of the clicked box
            function changeBackgroundColor(event) {
                box = event.currentTarget;
                box.style.backgroundColor = "#003566";
            }
            // Here we are looping through each element and attaching an onclick event
            for (var object of allObjects) {
                object.onclick = changeBackgroundColor;
            }
        </script>
    </body>
</html>

Getting an element by tag name
The document.getElementsByTagName() method allows you to return the selected HTML elements by it's tag name:
<!DOCTYPE html>
<html>
    <head>
        <title>Home</title>
    </head>

    <body>
        <div class="container">
            <div class="object"></div>
            <div class="object"></div>
            <div class="object"></div>
        </div>

        <script>
            // Return all elements with class name `object`
            var allObjects = document.getElementsByTagName("div");

            // Add border color to all `<div>` tags
            for (var object of allObjects) {
                object.style.borderColor = "#ffd60a";
            }
        </script>
    </body>
</html>

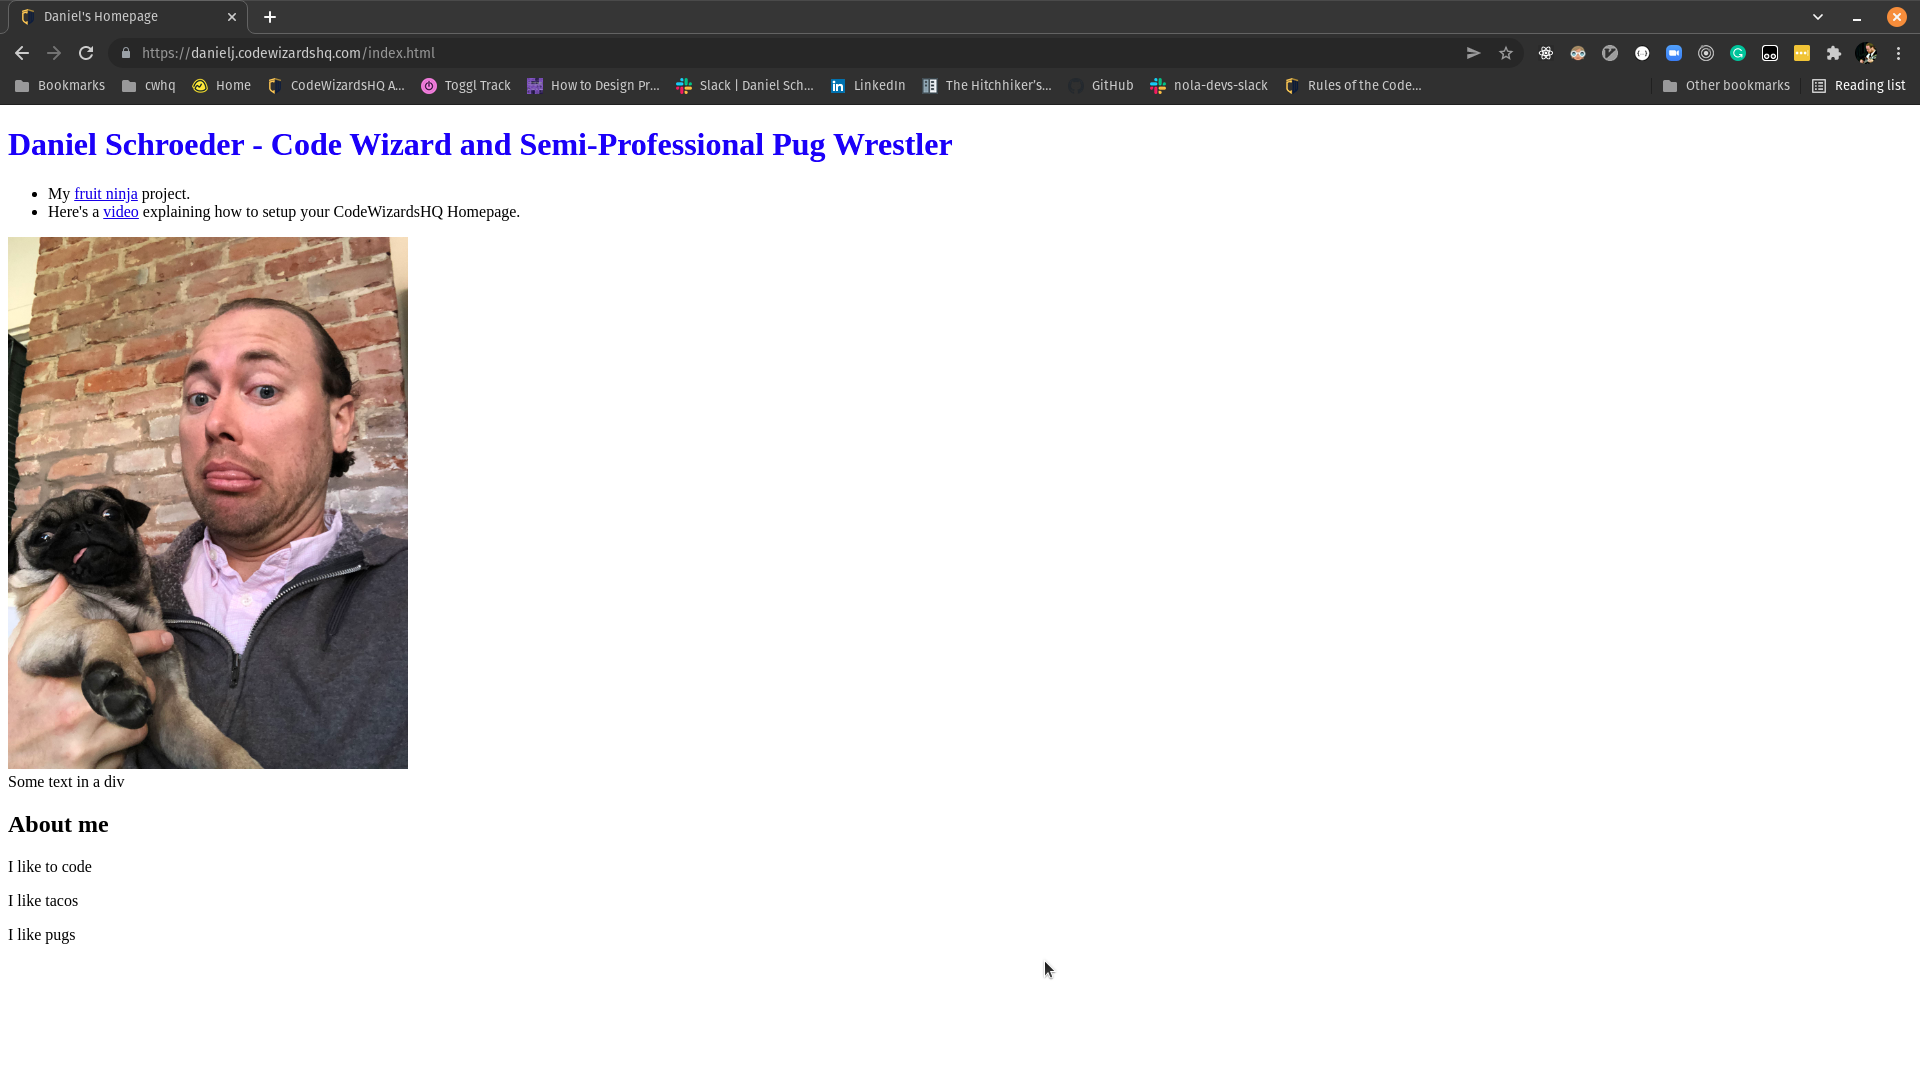
querySelector()
The document.querySelector() method allows you to return the first element with the given name:
<!DOCTYPE html>
<html>
    <head>
        <title>Home</title>
    </head>

    <body>
        <div class="container">
            <div class="object"></div>
            <div class="object"></div>
            <div class="object"></div>
        </div>
        <script>
            // Return the first element with the class name of `object`
            var firstElement = document.querySelector(".object");

            /*
             * Add color to the border of the first element with
             * the class name `object`
             */
            firstElement.style.borderColor = "red";
        </script>
    </body>
</html>
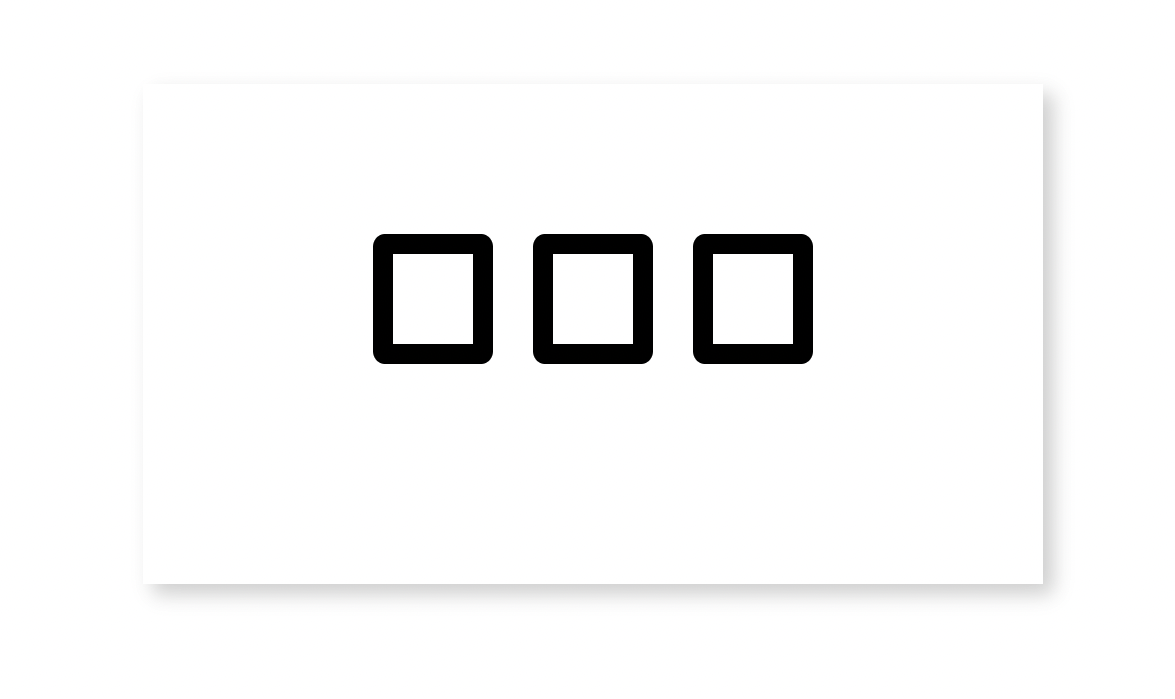
querySelectorAll()
The document.querySelectorAll() method allows you to return a list of all elements with the given attribute:
<!DOCTYPE html>
<html>
    <head>
        <title>Home</title>
    </head>

    <body>
        <div class="container">
            <div class="object"></div>
            <div class="object"></div>
            <div class="object"></div>
        </div>
        <script>
            // Return all elements with the class name of `object`
            var allObjects = document.querySelectorAll(".object");

            // Here we are looping through each element to change the `borderWidth`
            for (var object of allObjects) {
                object.style.borderWidth = "20px";
            }
        </script>
    </body>
</html>
Getting elements with jQuery
The jQuery library allows you to select elements with the $() function. You can add any valid CSS selector as the argument.
Here, we use the id attribute to select a single element:
<!DOCTYPE html>
<html>
    <head>
        <title>Daniel's Homepage</title>
        <!-- Must include the jQuery library in the <head> -->
        <script
            src="https://code.jquery.com/jquery-3.6.0.min.js"
            integrity="sha256-/xUj+3OJU5yExlq6GSYGSHk7tPXikynS7ogEvDej/m4="
            crossorigin="anonymous"
        ></script>
    </head>

    <body>
        <!-- This is the element we'll grab from our JavaScript program -->
        <h1 id="page-title">
            Daniel Schroeder - Code Wizard and Semi-Professional Pug Wrestler
        </h1>

        <!-- HTML abbreviated since it's not important -->

        <script>
            // Get the #page-title element and store it in a variable
            var pageTitleElement = $("#page-title");
            // Change the font color of the #page-title element
            pageTitleElement.attr("style", "color: blue");

            // Can also do everything in one line
            $("#page-title").attr("style", "color: blue");
        </script>
    </body>
</html>
You can select multiple elements as well. For example, elements that all share the same class can be edited together like this:
<!DOCTYPE html>
<html>
    <head>
        <title>Daniel's Homepage</title>
        <!-- Must include the jQuery library in the <head> -->
        <script
            src="https://code.jquery.com/jquery-3.6.0.min.js"
            integrity="sha256-/xUj+3OJU5yExlq6GSYGSHk7tPXikynS7ogEvDej/m4="
            crossorigin="anonymous"
        ></script>
    </head>

    <body>
        <!-- Other HTML abbreviated since it's not important -->

        <div>
            <h2>About me</h2>
            <!-- We'll grab these elements from JavaScript -->
            <p class="likes">I like to code</p>
            <p class="likes">I like tacos</p>
            <p class="likes">I like pugs</p>
        </div>

        <script>
            // Get the .likes elements and store them in a variable
            var likesElements = $(".likes");
            // Change the font color of all the .likes elements
            likesElements.attr("style", "color: red");

            // Can also do everything in one line
            $(".likes").attr("style", "color: red");
        </script>
    </body>
</html>
Further Reading
- The Modern JavaScript Tutorial - Searching DOM Elements
- Eloquent JavaScript - Finding Elements
- Learn jQuery - Selecting Elements
Styling DOM Nodes
element.style
The style property allows you to set or adjust an element's CSS styles from JavaScript.
Note
JavaScript syntax for accessing style properties differs from CSS syntax.
| CSS | Javascript |
|---|---|
| background-color: blue; | backgroundColor = "blue"; |
| background-image: url("taco.png"); | backgroundImage = "url(taco.png)"; |
| font-size: 40px; | fontSize = "40px"; |
<!DOCTYPE html>
<html>
    <head>
        <title>Changing An Element's Style</title>
    </head>

    <body>
        <div class="container">
            <div class="object" id="one"></div>
        </div>

        <script>
            var element = document.getElementById("one");

            function changeStyle() {
                element.style.borderColor = "blue";
                element.style.backgroundImage =
                    "linear-gradient(blue,gold,black)";
            }

            element.onclick = changeStyle;
        </script>
    </body>
</html>
$(element).css()
jQuery's css() method allows you to set or return the style of an element
<!DOCTYPE html>
<html>
    <head>
        <title>Changing An Element's Style</title>
        <script
            src="https://code.jquery.com/jquery-3.6.0.min.js"
            integrity="sha256-/xUj+3OJU5yExlq6GSYGSHk7tPXikynS7ogEvDej/m4="
            crossorigin="anonymous"
        ></script>
    </head>

    <body>
        <div class="container">
            <div class="object" id="one"></div>
        </div>

        <script>
            function changeStyle() {
                var boxCSS = {
                    borderColor: "blue",
                    backgroundImage: "linear-gradient(black,blue,gold)",
                };
                $(".object").css(boxCSS);
            }

            $(".object").click(changeStyle);
        </script>
    </body>
</html>

$(element).addClass() and $(element).removeClass()
jQuery also has two methods for adding/removing classes on an element. These can be easier to use than other methods of styling DOM nodes from JavaScript since you can write the CSS in it's own file.
<!DOCTYPE html>

<html>
    <head>
        <title>Adding and Removing Classes</title>
        <script
            src="https://code.jquery.com/jquery-3.6.0.min.js"
            integrity="sha256-/xUj+3OJU5yExlq6GSYGSHk7tPXikynS7ogEvDej/m4="
            crossorigin="anonymous"
        ></script>
        <style>
            button {
                margin: 48px auto;
                font-size: 24px;
            }

            #button-1 {
                position: fixed;
                top: 100px;
                left: 300px;
            }

            .red {
                color: red;
            }
        </style>
    </head>

    <body>
        <button id="button-1">Button 1</button>

        <button onclick="addRedClass();">Add ".red" class to button 1</button>
        <button onclick="removeRedClass();">
            Remove ".red" class from button 1
        </button>

        <script>
            var button1 = $("#button-1");

            function addRedClass() {
                button1.addClass("red");
            }

            function removeRedClass() {
                button1.removeClass("red");
            }
        </script>
    </body>
</html>

Further Reading
Timers
There are two timer functions that allow us to execute code at a later time.
setTimeout()
The setTimeout() function will execute a callback function after waiting for some amount time.
Function signature:
var timeoutID = setTimeout(callbackFunction, milliseconds);
Parameters:
callbackFunction(function): The function you want to run after the given interval.milliseconds(number): The amount of time before thecallbackFunctionshould run.
Returns:
- A numeric ID representing the eventual execution of the
callbackFunction.
Example usage:
function addCat() {
    var catImage = document.getElementById("cat");
    catImage.style.opacity = 1;
}

// Execute the `addCat()` function after 10,000 milliseconds (10 seconds).
setTimeout(addCat, 10000);
setInterval()
The setInterval() function will execute a given callback function repeatedly over a set time interval.
Function signature:
var intervalID = setInterval(callbackFunction, milliseconds);
Parameters:
callbackFunction(function): The function to run every givenmilliseconds.milliseconds(number): The amount of time between each execution ofcallbackFunction.
Returns:
- A numeric ID representing the interval executing the
callbackFunction.
Example Usage:
var likes = 0;

function increaseCatLikes() {
    likes++;
    document.getElementById("likes").textContent = likes;
}

// Execute the `increaseCatLikes()` function every 5,000 milliseconds (5 seconds).
setInterval(increaseCatLikes, 5000);

clearTimeout()
If you need to cancel execution of a callback function setup by setTimeout() or setInterval() use clearTimeout(). This function will require an intervalID parameter for the timeout or interval you are trying to clear.
Function signature:
clearTimeout(intervalID);
Parameters:
intervalID(number): The interval ID returned fromsetTimeout()orsetInterval().
Example usage:
Here's how you can cancel a function that setTimeout() is going to execute:
function addCat() {
    var catImage = document.getElementById("cat");
    catImage.style.opacity = 1;
}

// Execute the `addCat()` function after 10,000 milliseconds (10 seconds).
var catTimeoutID = setTimeout(addCat, 10000);

/*
 *   This function could be run by another part of the script to cancel
 *   the execution fo the `addCat()` function. It would only work if the
 *   time interval (10 seconds) hand't already passed.
 */
function stopAddCat() {
    clearTimeout(catTimeoutID);
}
Here's how you can cancel a function that setInterval() is running:
var likes = 0;

function increaseCatLikes() {
    likes++;
    document.getElementById("likes").textContent = likes;

    if (likes == 20) {
        alert("Interval cleared");
        // `clearInterval()` will stop executing `catLikes()` after 20 likes.
        clearInterval(catIntervalID);
    }
}

var catIntervalID = setInterval(increaseCatLikes, 5000);
Further Reading
- The Modern JavaScript Tutorial - Scheduling
- Eloquent JavaScript - Timers
- MDN - setTimeout
- MDN - setInterval
Play / Pause Media
Javascript play() and pause() functions allow you to control media on your webpage.
<!DOCTYPE html>
<html>
    <head>
        <title>Audio</title>
    </head>

    <body>
        <div class="container">
            <img id="taco" src="tacos.png" />
            <audio
                id="audio"
                src="audio/never-gonna-give-you-up.mp3"
                preload
            ></audio>
            <button id="btn" style="opacity: 0;">Stop</button>
        </div>

        <script>
            var taco = document.getElementById("taco");
            var audio = document.getElementById("audio");
            var btn = document.getElementById("btn");

            function play() {
                // currentTime property controls the playback position in seconds.
                audio.currentTime = 0;
                audio.play();
                btn.style.opacity = 1;
            }
            function pause() {
                audio.pause();
            }

            taco.onclick = play;
            btn.onclick = pause;
        </script>
    </body>
</html>
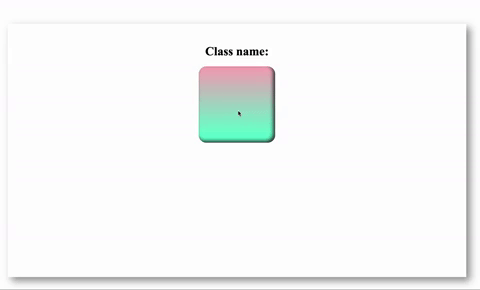
Event Object
On a clicked element, we can access several properties, including the target property, by using the event object.
This allows us to return the clicked element's HTML:
<!DOCTYPE html>
<html>
    <head>
        <title>Event</title>
        <style>
              #red-box {
              width: 200px;
              height: 200px;
              margin: auto;
              border-radius: 10%;
              background-color: #ff1141;
              box-shadow: inset -5px -5px 10px rgb(57, 57, 57);
              background-image: linear-gradient(rgb(255, 173, 187), rgb(80, 255, 211));
          }
        </style>
    </head>

    <body>
        <div class="container">
            <h1>Class name: </h1>
            <div class="box" id="red-box"></div>

        </div>

        <script>
            var box = document.querySelector('.box')
            var heading = document.querySelector('h1')

            function clickedElement(event) {
                // here we are accessing the clicked element
                var clickedBox = event.target;
                console.log(clickedBox)
                /* here we changing the text
                to show the class name of the clicked box
                */
                heading.textContent += clickedBox.className
            }
            box.onclick = clickedElement;


        </script>
    </body>
</html>